


In our previous article, we explored the process of setting up Kali Linux within a UTM Virtual Machine at no cost. In this current article, we have provided a comprehensive, step-by-step visual guide, making it accessible for anyone to learn the entire procedure of initiating, configuring, and installing Kali Linux on the UTM platform. These instructions are tailored for Mac users running macOS Big Sur and newer versions, ensuring a straightforward setup experience.
Step 1:
Download UTM from UTM VM official website located here. The site looks like this:

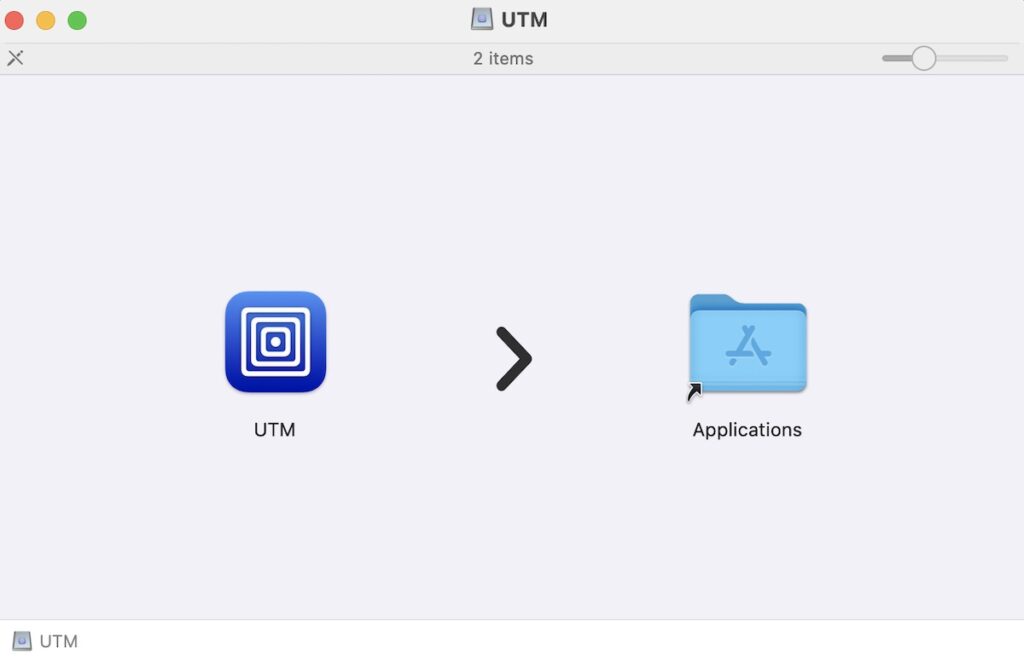
Step 2:
To install UTM, begin by opening the downloaded UTM.dmg file. Afterward, simply drag the UTM application into your Applications folder. As a Mac user, you’re likely familiar with the concept that dragging an application to the Applications folder effectively installs it.
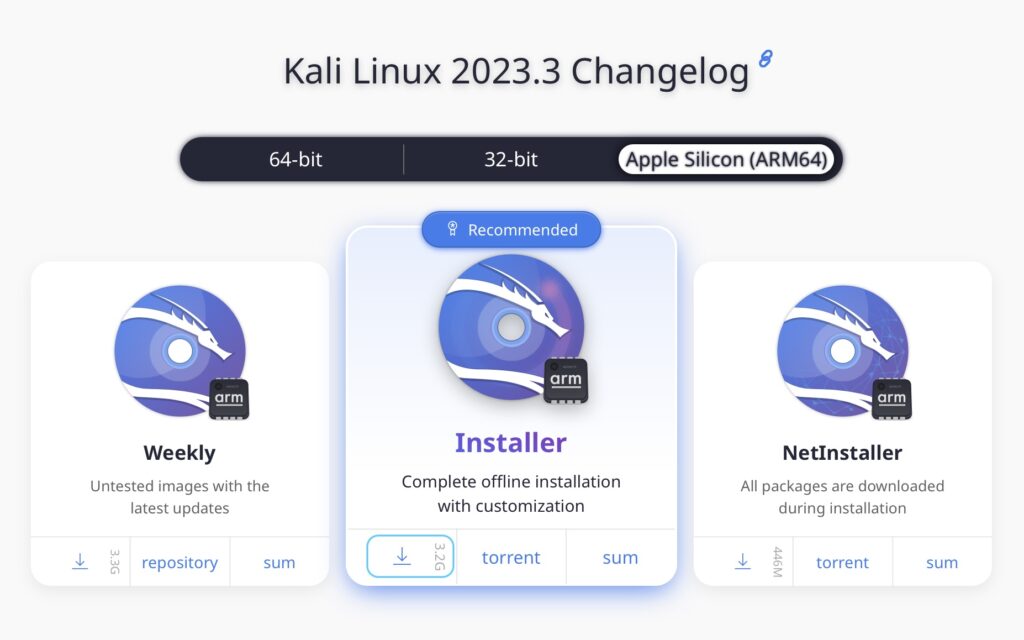
Step 3:
Simultaneously, download the Kali Linux ISO image for your Mac from Kali Linux’s official site. Choose the appropriate version for your Mac (Apple Silicon for M series Macs or 64-bit for Intel Macs).
Step 4:
Now, open the UTM application (which will be in the Applications folder) and click the “+” button that will say “Create a New Virtual Machine” to begin the Virtual Machine Wizard.

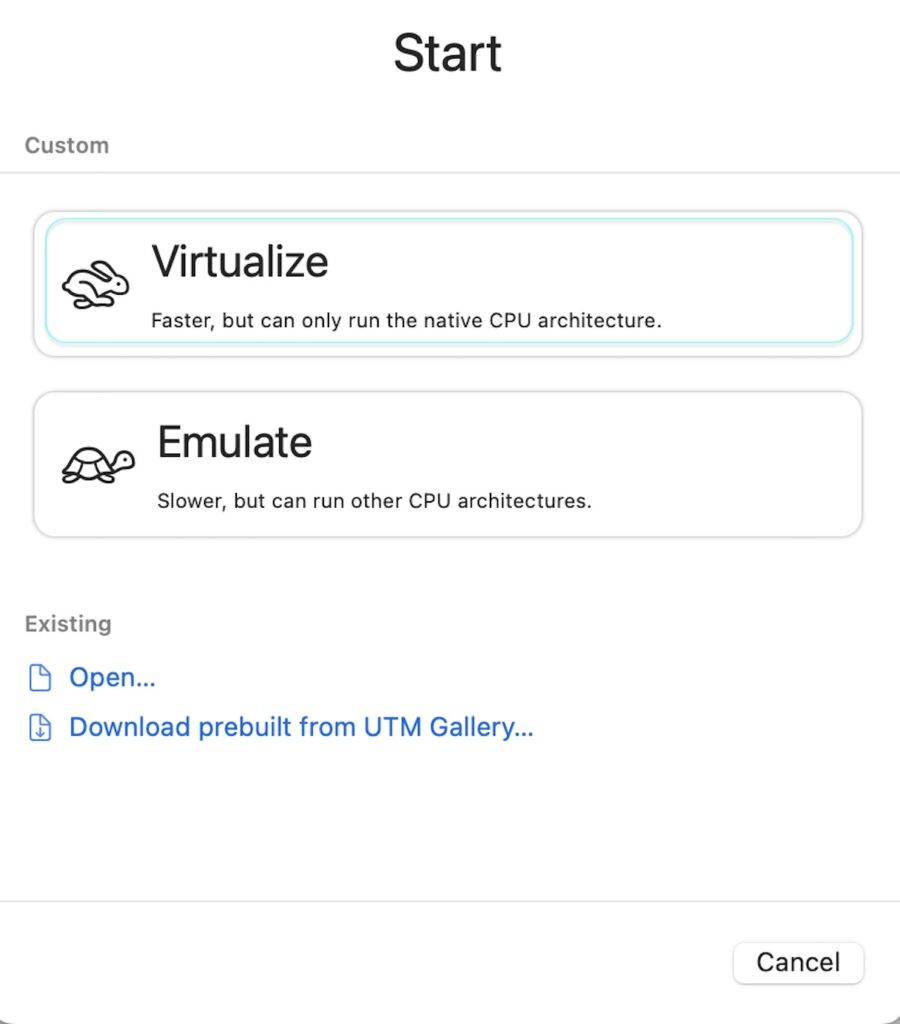
Step 5:
In the following screen titled “Start”, click on “Virtualize”.
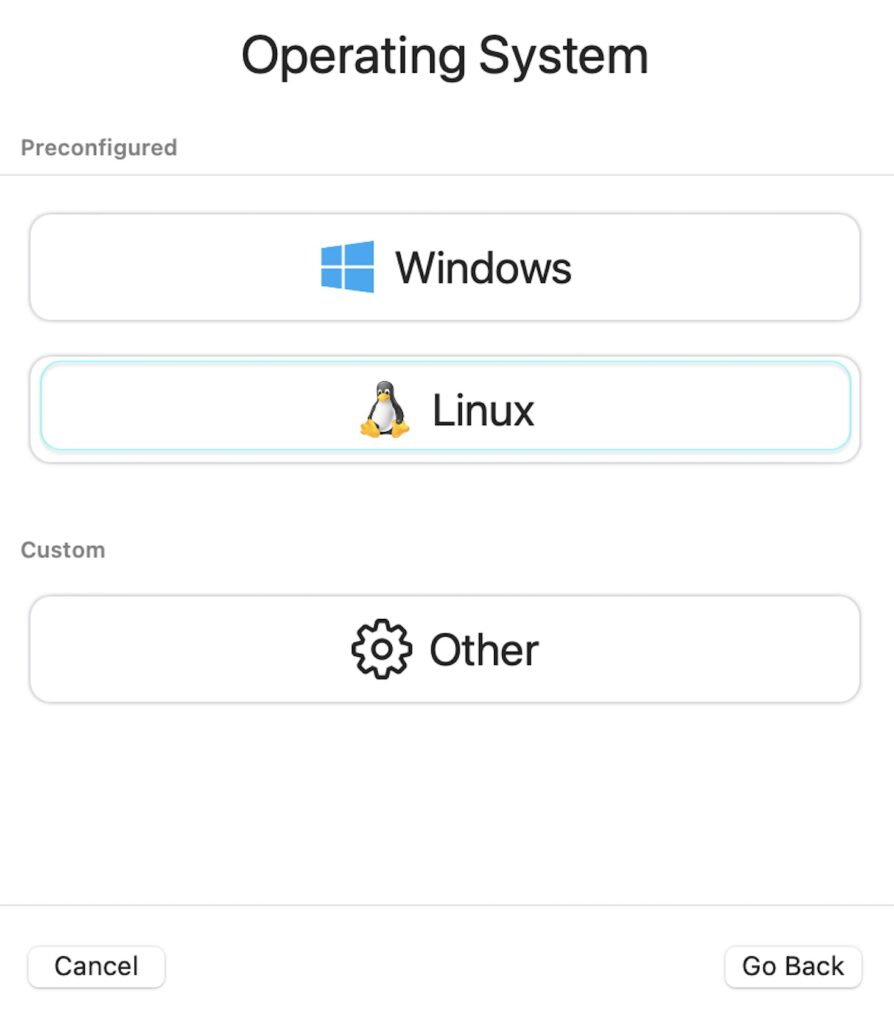
Step 6:
In the upcoming window labeled “Operating System,” opt for “Linux.”
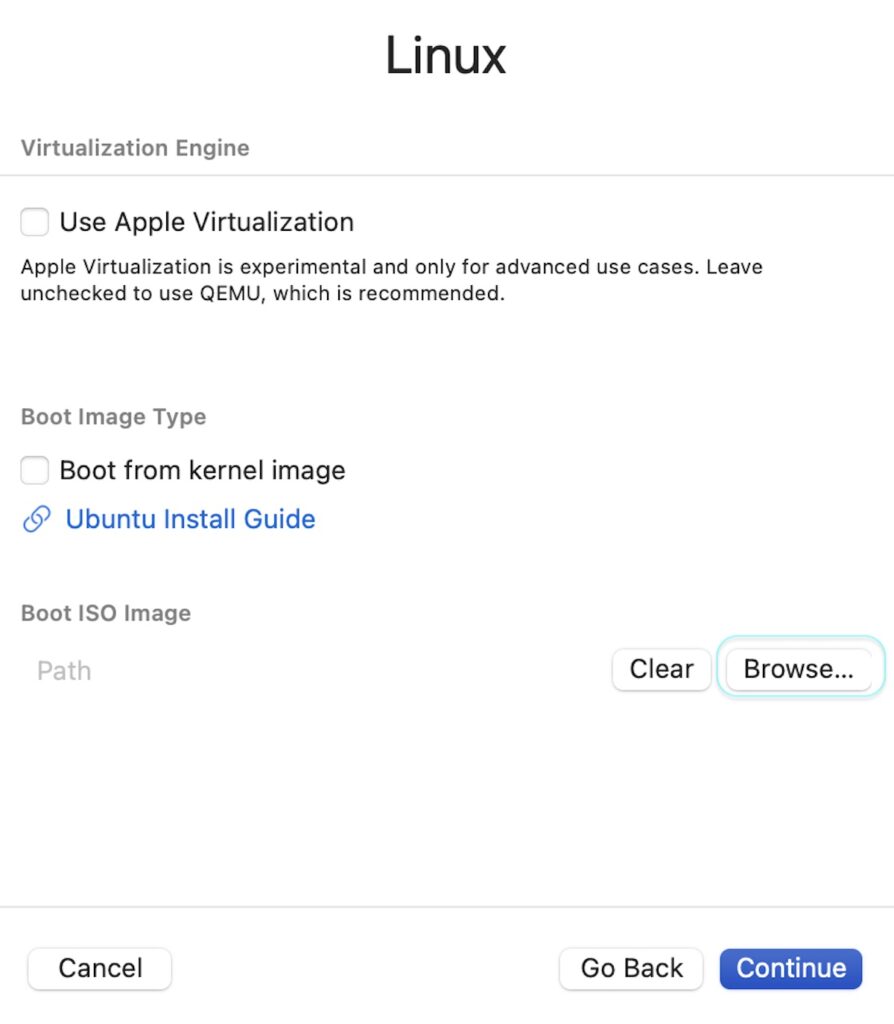
Step 7:
After step 6 is completed, it will lead to open “Linux” titled window with a “Browse” button on the bottom right. click on “Browse”.
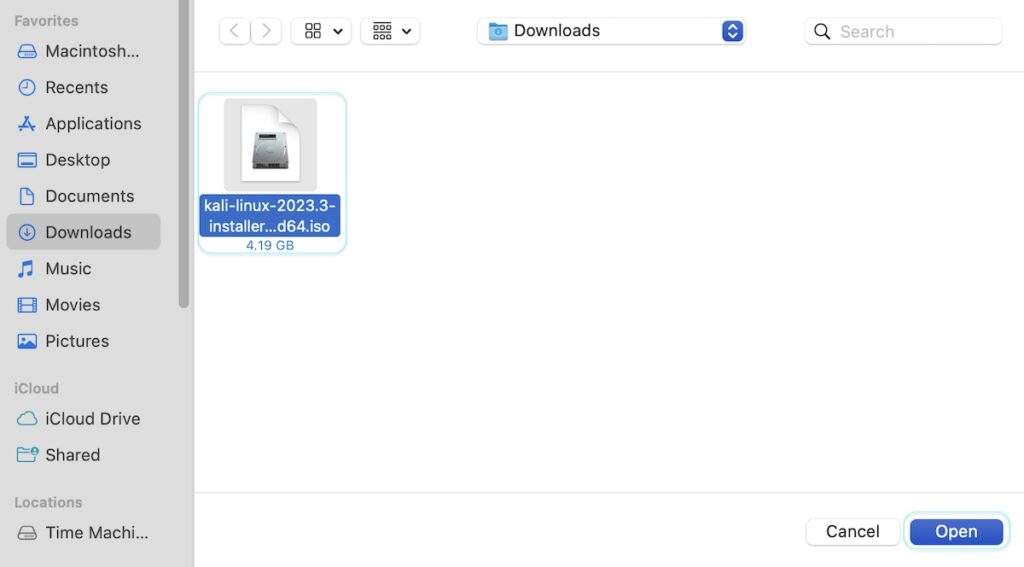
Step 8:
By now, your Kali Linux should have finished downloading. Select the Kali ISO image file (it may look like the .iso name presented below. Click on “Open.”
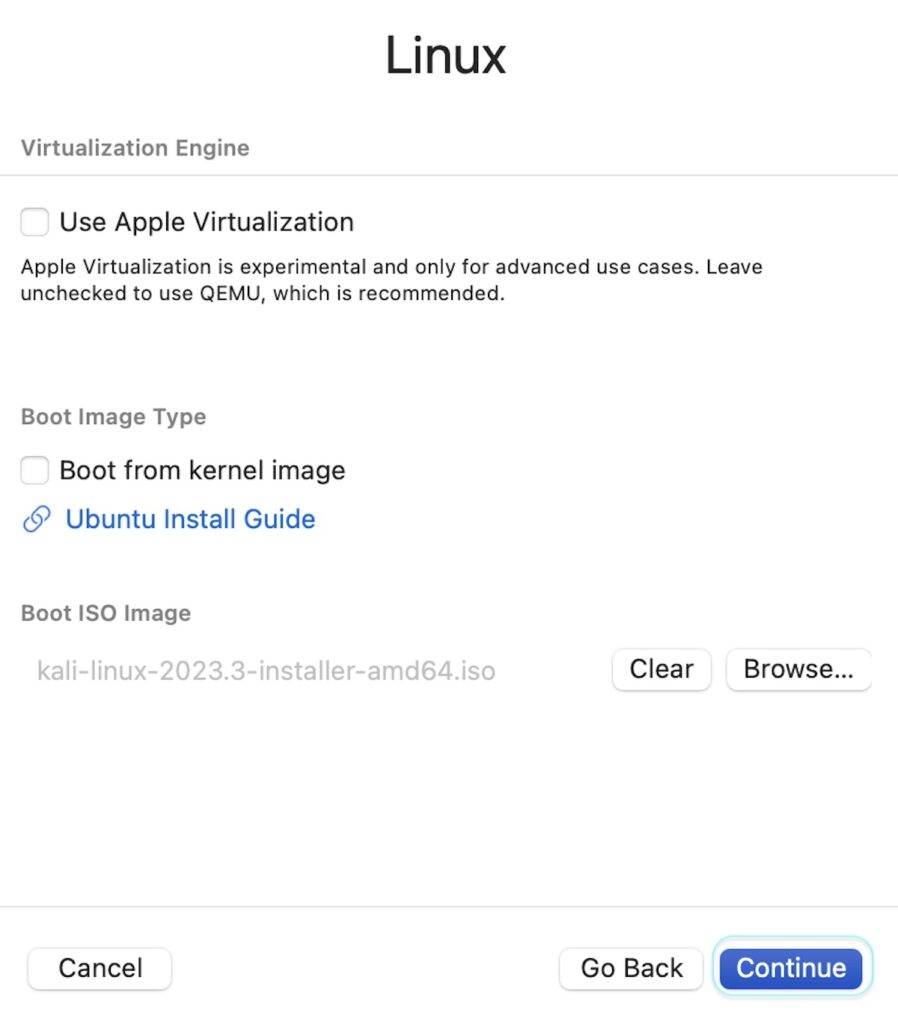
Step 9:
Having successfully located the Kali image file, the very repository of Kali itself, proceed by clicking on “Continue.”
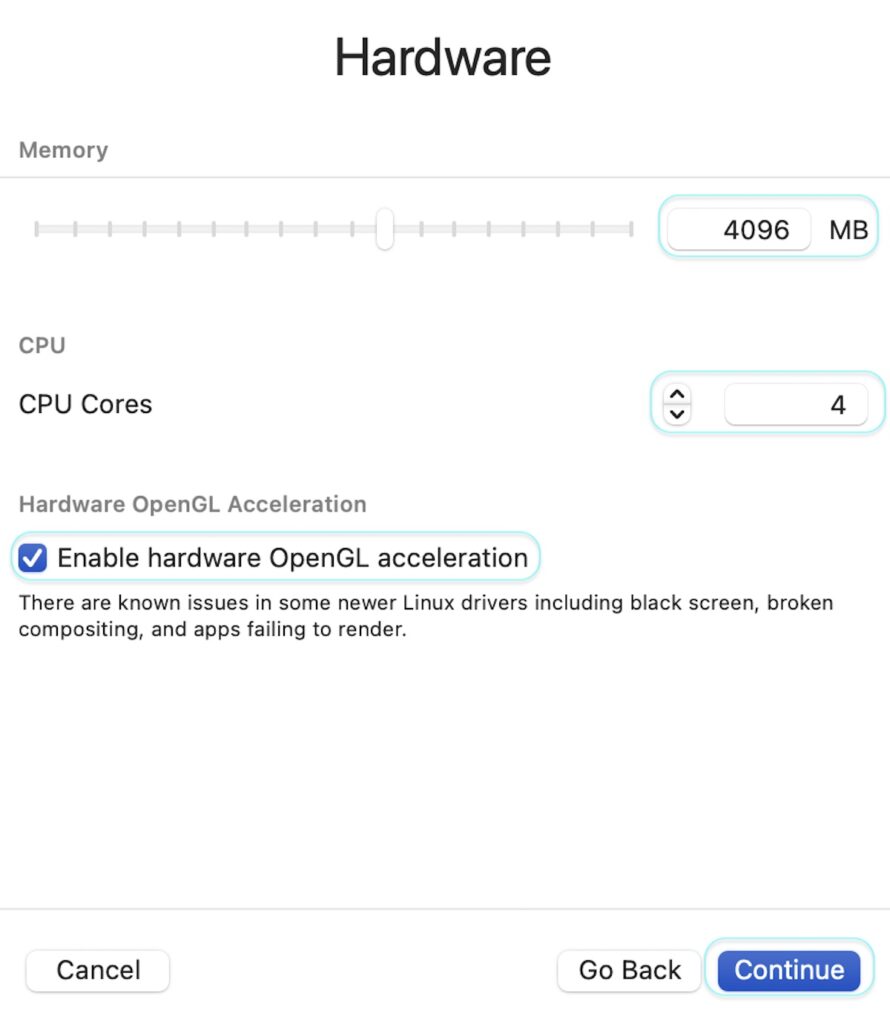
Step 10:
In the following window titled “Hardware,” you’re here to fine-tune your settings for Memory and CPU Cores according to your preferences. While I recommend keeping the memory as per the default setting, consider increasing the CPU Cores to 4. Additionally, check the box labeled “Enable hardware OpenGL acceleration.” After making these adjustments, click on “Continue.”
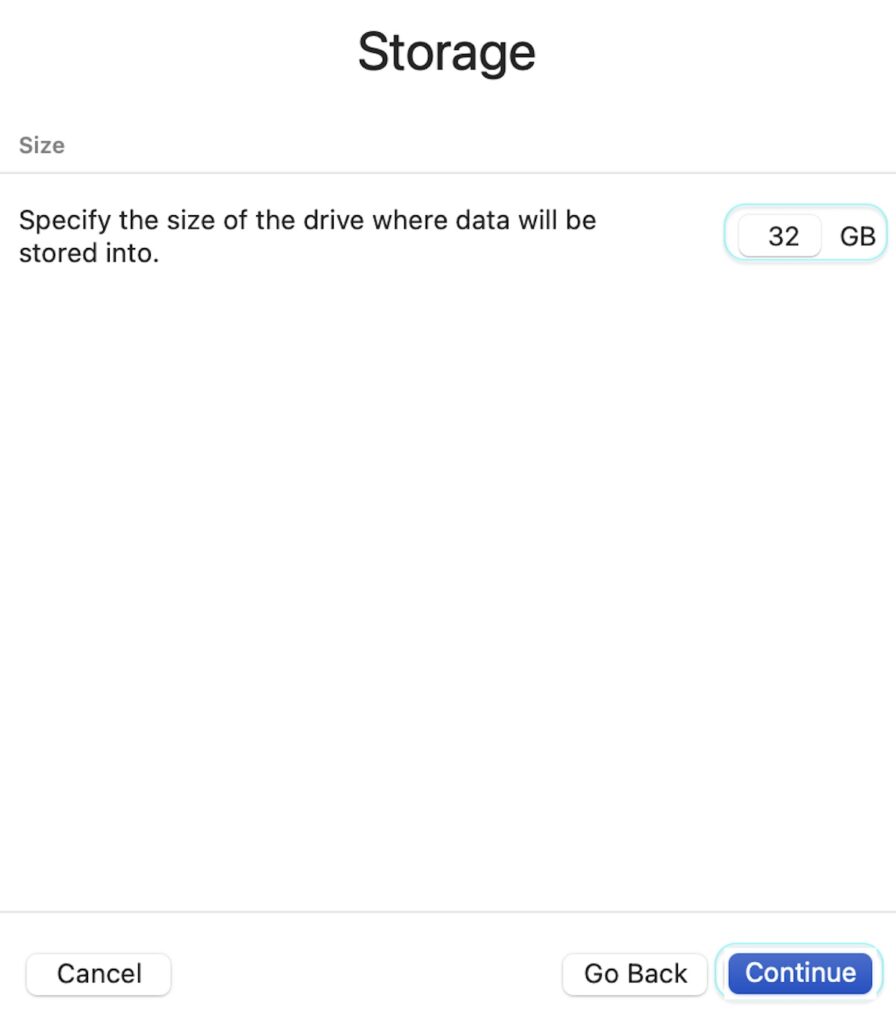
Step 11:
The subsequent screen will pertain to “Storage.” Here, specify approximately 32GB and then proceed by clicking on “Continue.”
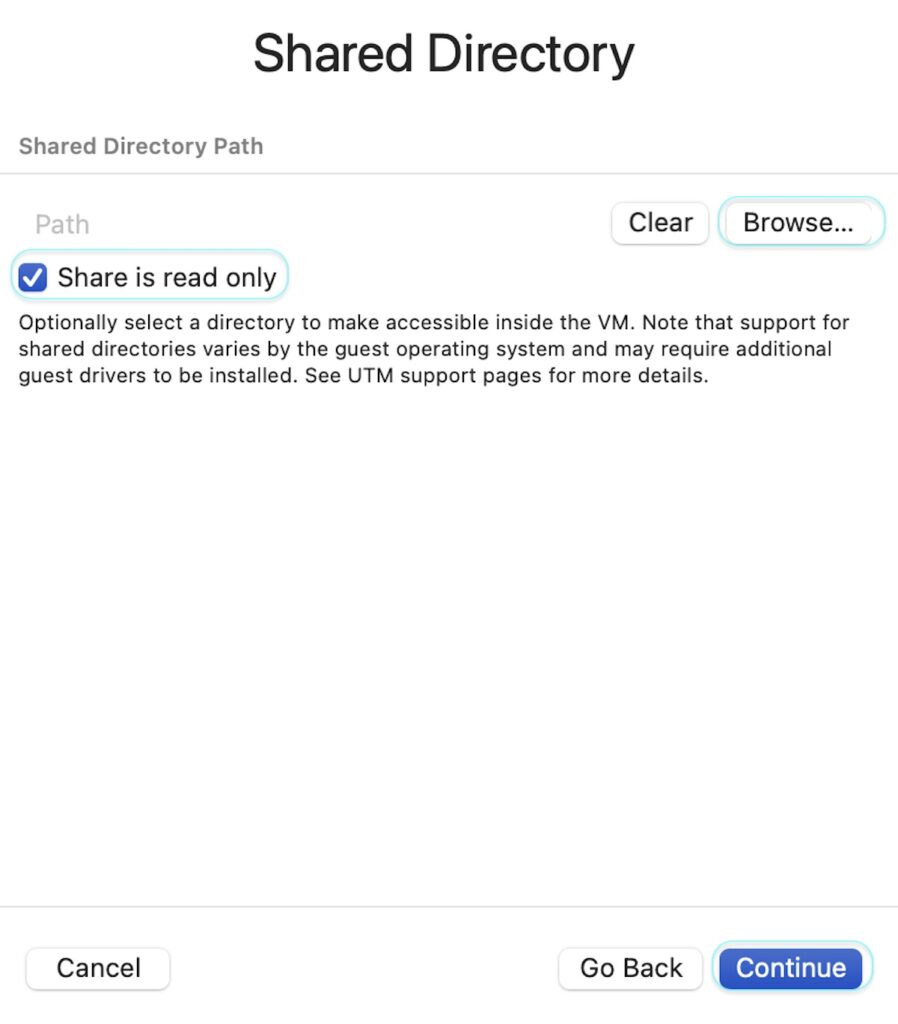
Step 12:
In the next window, you’ll have the opportunity to choose a folder for sharing between your host and guest machines, facilitating the seamless exchange of files such as images and other materials while using Kali. If you currently don’t require file sharing, feel free to leave this field empty, as you can configure it later as needed. However, if you wish to set up a shared folder now with an added layer of security, you can select the “Share is read-only” option. To proceed, click on “Continue.”
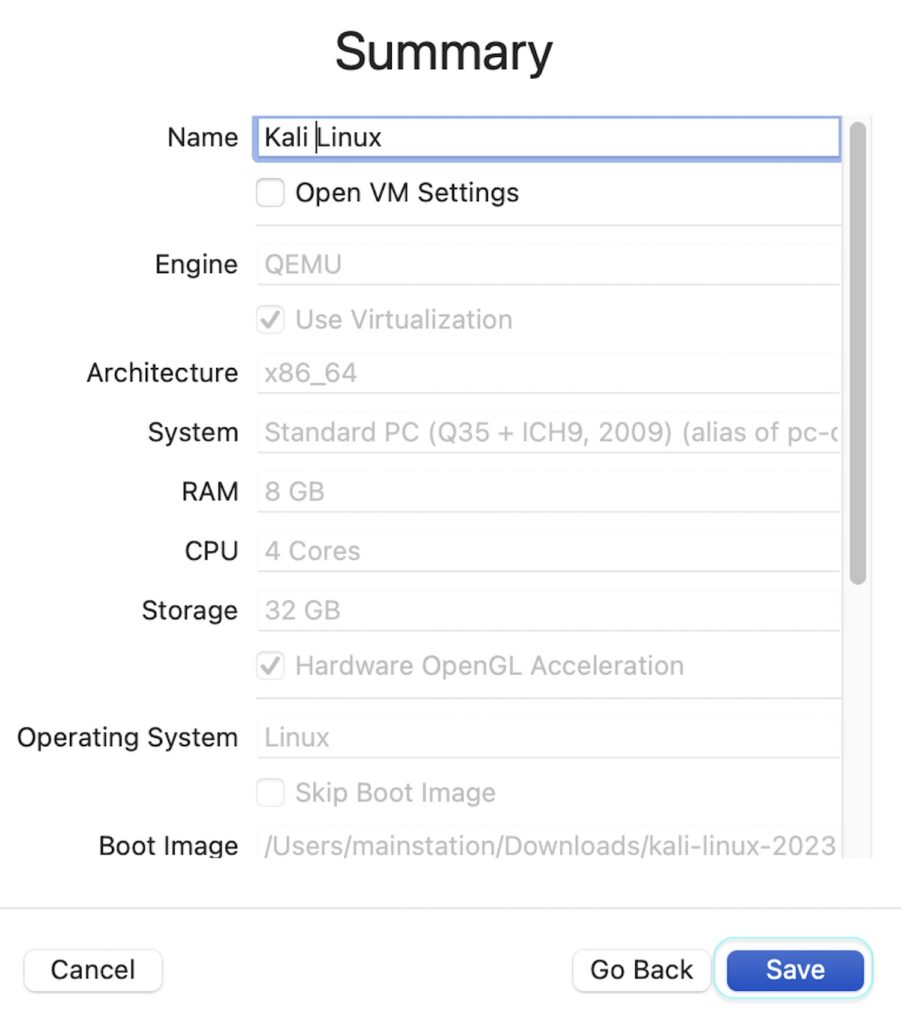
Step 13:
There comes your “Summary” window, displaying all the selections and configurations you’ve made. If you notice any steps that need correction, you can always go back and make adjustments. In this window, give your VM a name, such as “Kali Linux” or any name of your choice. Remember that you can rename it later if needed. After naming your VM, click on “Save.”
Step 14:
With your VM configuration complete, it’s time to make any necessary tweaks. Simply right-click on your VM’s name and select “Edit.”

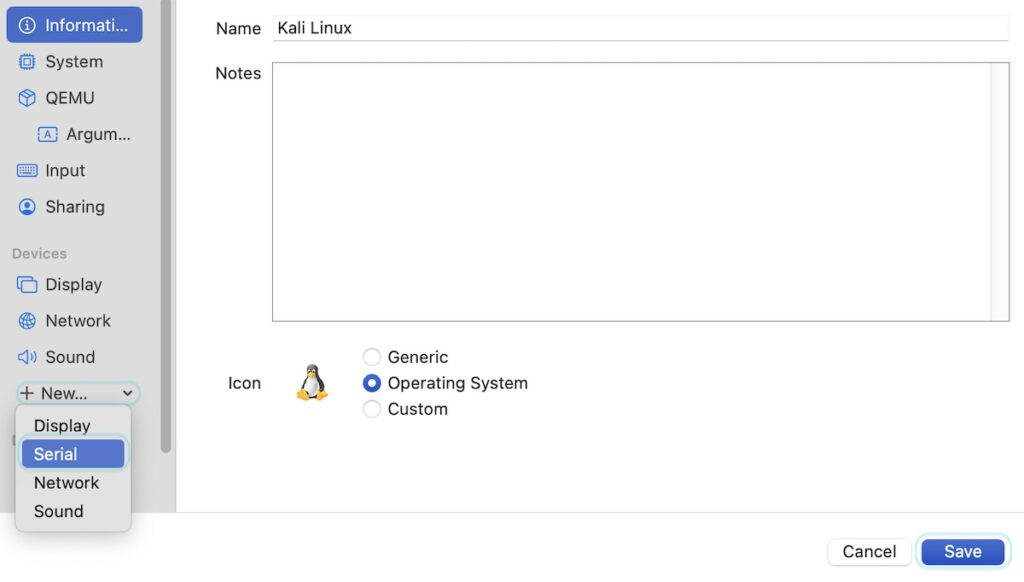
Step 15:
Scrolling down the left menu section a bit further will reveal “+ New…“. Click on it and then select “Serial.” Finally, click on “Save.” That’s all there is to it!
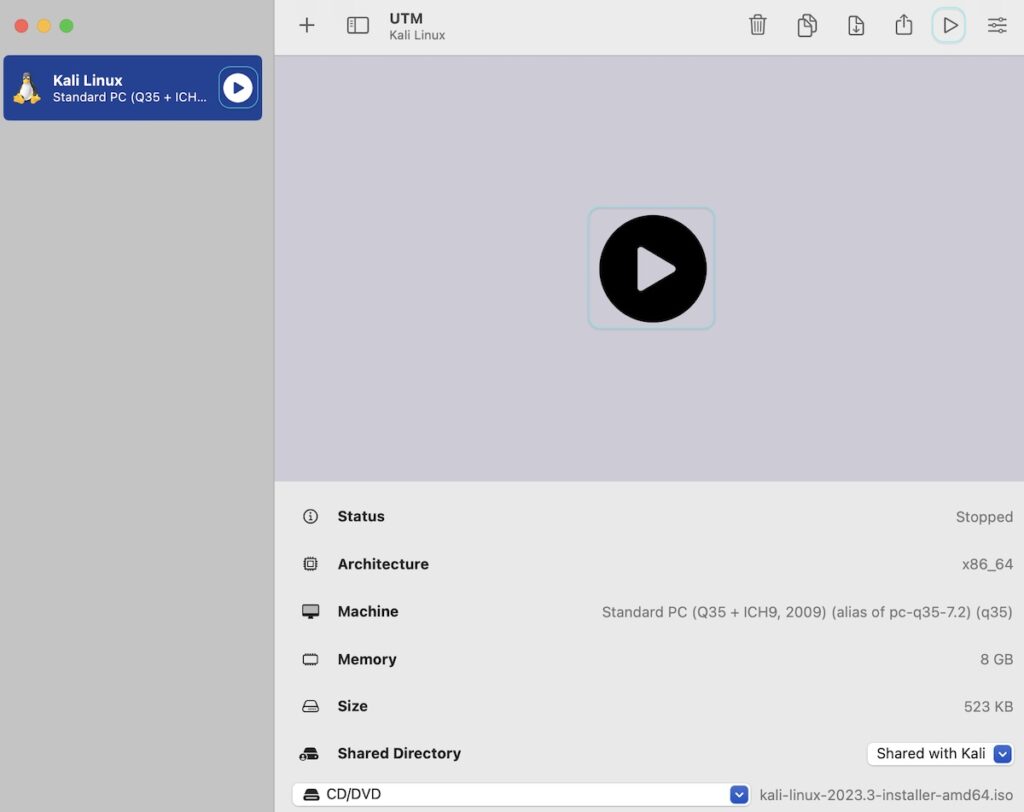
Step 16:
With your virtual machine now customized to your preferences, it’s time to kick off the Kali Linux installation process. Grab your favorite beverage and prepare for an exciting exploration. In the current window, you’ll notice several play icons/buttons. Feel free to click on any of them to initiate the installation process. Go ahead and select one to get started on your Kali Linux journey.
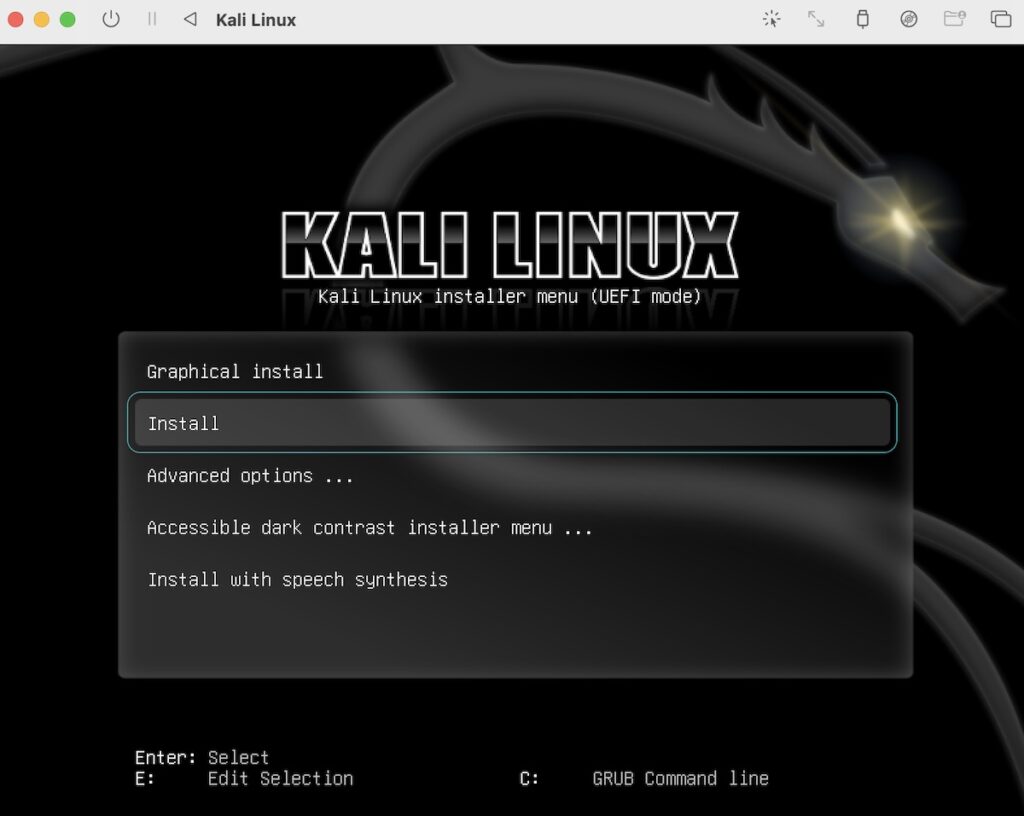
Step 17:
Excellent! You’ll now encounter a Kali Linux startup configuration window, as depicted below. To proceed, either select “Install” by pressing the “Tab” key on your keyboard if it’s not already highlighted, or if “Install” is already selected, just press the “Return/Enter” key on your keyboard.
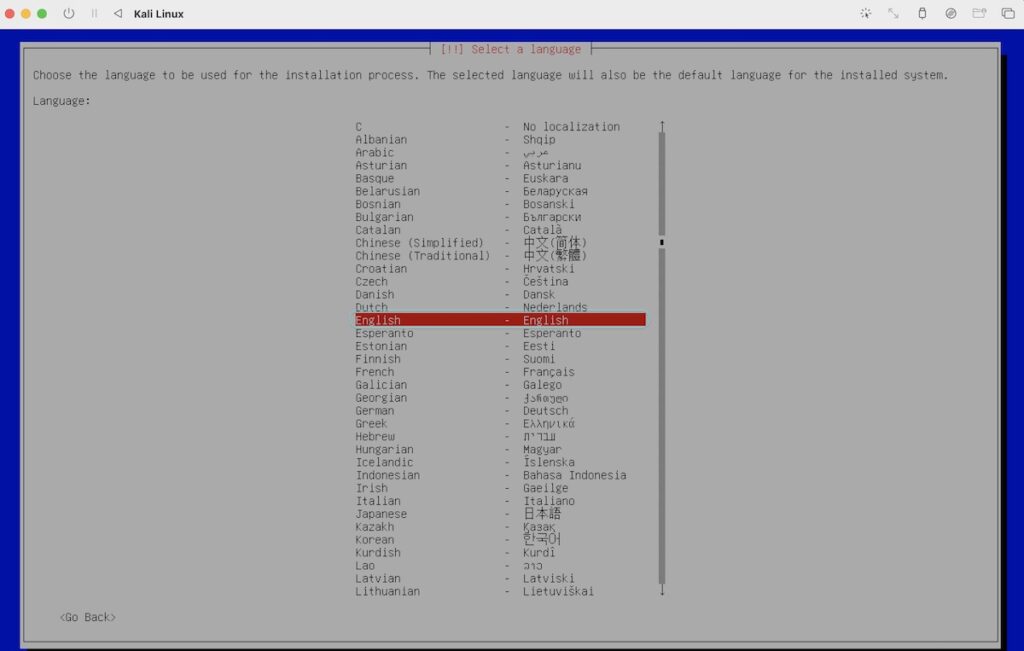
Step 18:
A fresh window labeled “Select a language” will emerge, with a default language preselected based on your host machine’s settings. You can choose a different language by using the up or down arrow keys. If you’re content with the default language, simply press “Return” to proceed.
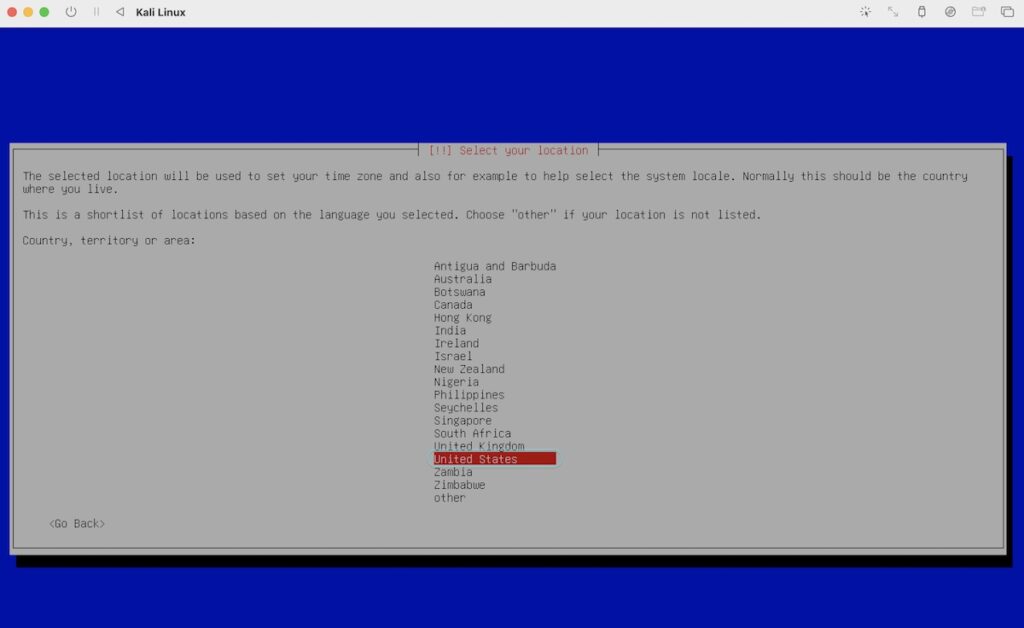
Step 19:
Following the language selection, you’ll be directed to the “Select your location” page, where the default choice will align with your host machine’s settings. If you wish to change the location to one that suits your preferences, feel free to make a selection. Otherwise, you can simply press “Return” to proceed with the default setting.
Step 20:
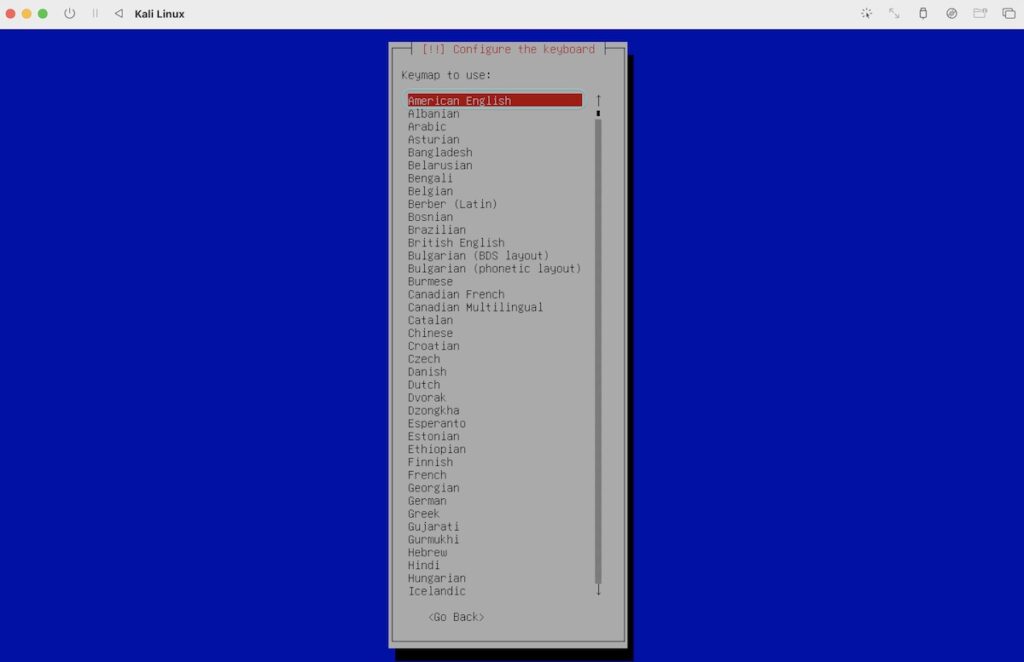
Now that your location is established, it’s time to configure the keyboard settings. If you’re content with the default configuration, you can proceed by simply pressing “Return.”
Step 21:
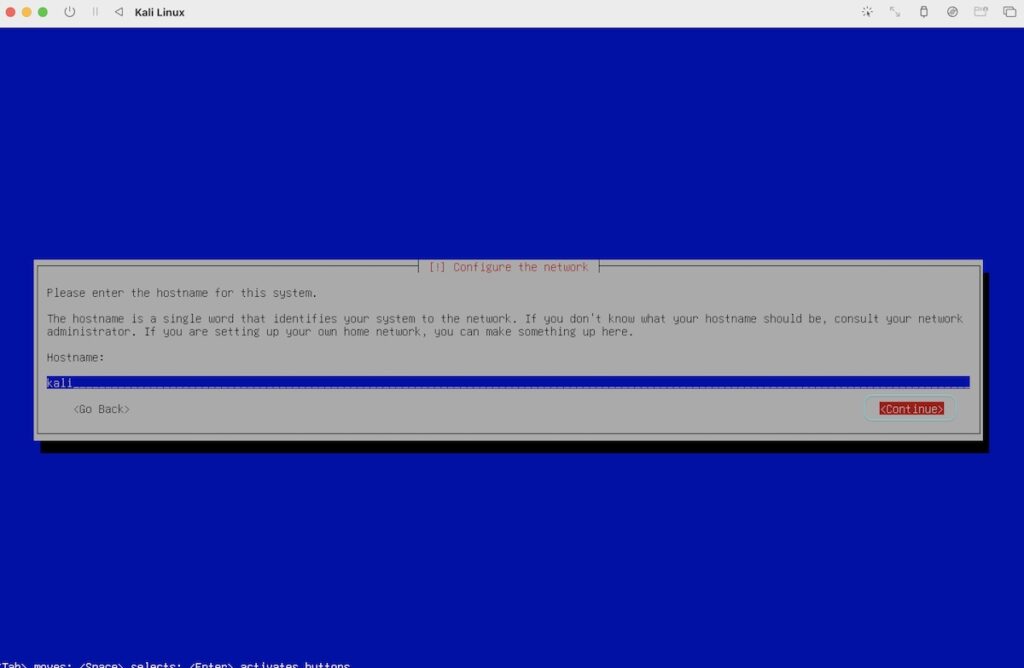
Everything is proceeding smoothly. Now, you’ll be presented with the option to configure the network settings. By default, “kali” will be the selected hostname. You have the freedom to choose any name you prefer, but remember to use all lowercase letters. You can either change it to your liking or leave it as “kali,” and to move forward, press “Return.” In case the “Continue” button isn’t highlighted, simply press “Tab” to select it, and then hit “Return” to proceed.
Step 22:
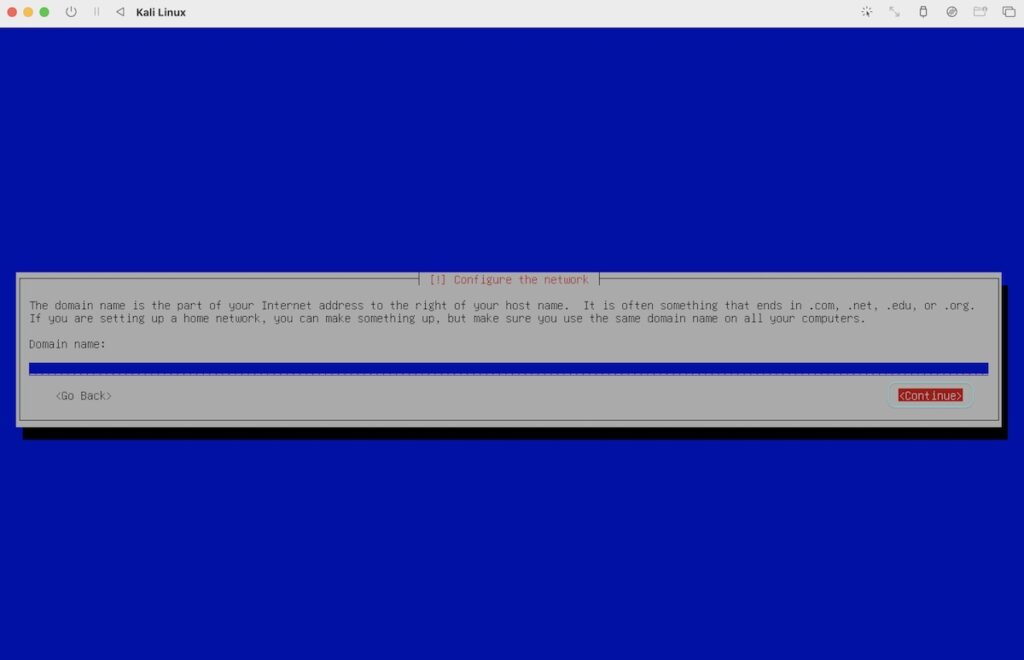
On the following page, you’ll encounter an option to set up a domain name. By default, this field will be empty, and it’s perfectly fine to leave it that way. If you happen to have a specific domain name, like “example.com,” that you’d like to configure, you can do so at this point. However, if you’re following this tutorial as a beginner, it’s recommended to leave the domain name blank. Press “Return” to proceed.
Step 23:
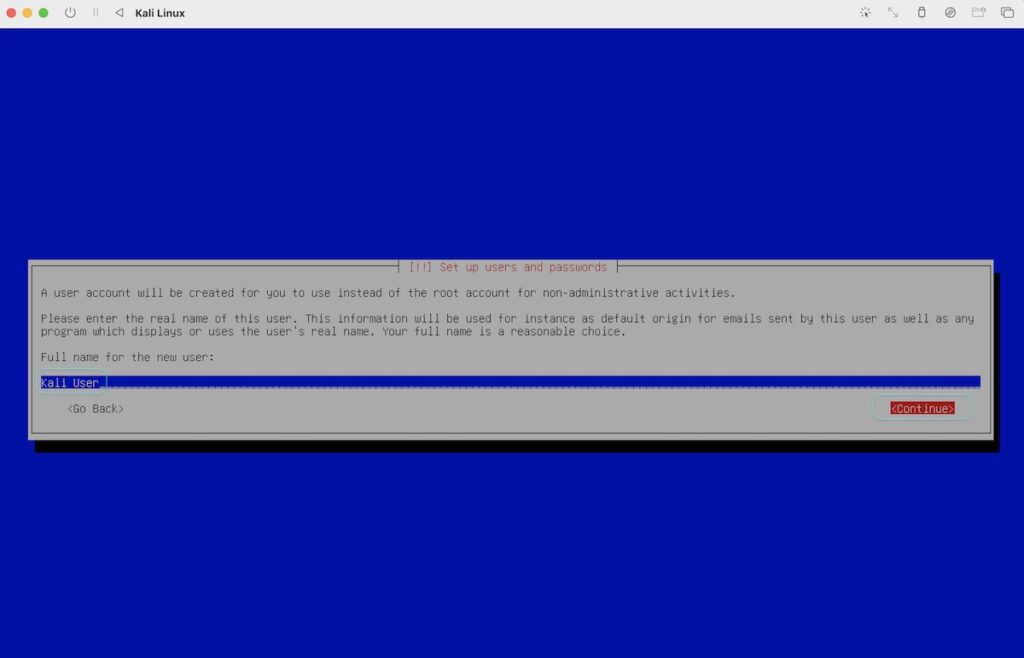
Now, let’s proceed with setting up your user and password details. Begin by entering the desired name in the “Full name for the new user” box; you have complete freedom to choose any name you prefer. After inputting the name, press the “Tab” key once and then hit “Return” to move forward.
Step 24:
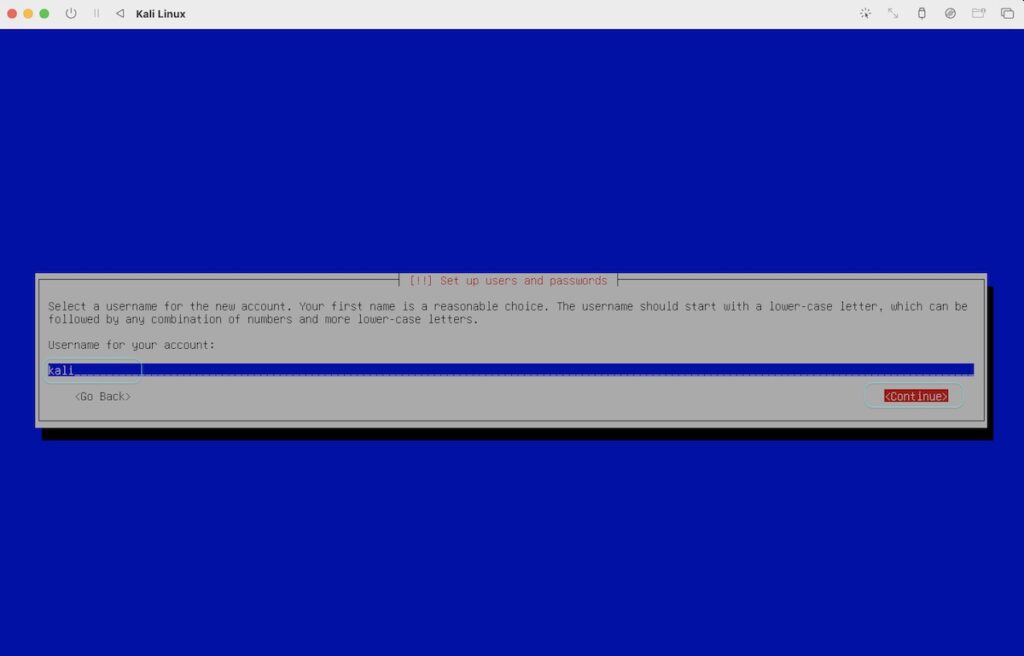
Following the input of your full name, you’ll need to establish a username for your virtual machine, and this is a crucial step. Remember that if you forget your username, you won’t be able to log in later. Choose a username that is both straightforward and unique to you. After entering your desired username, press the “Tab” key to highlight “Continue,” and then press “Return” to proceed.
Step 25:
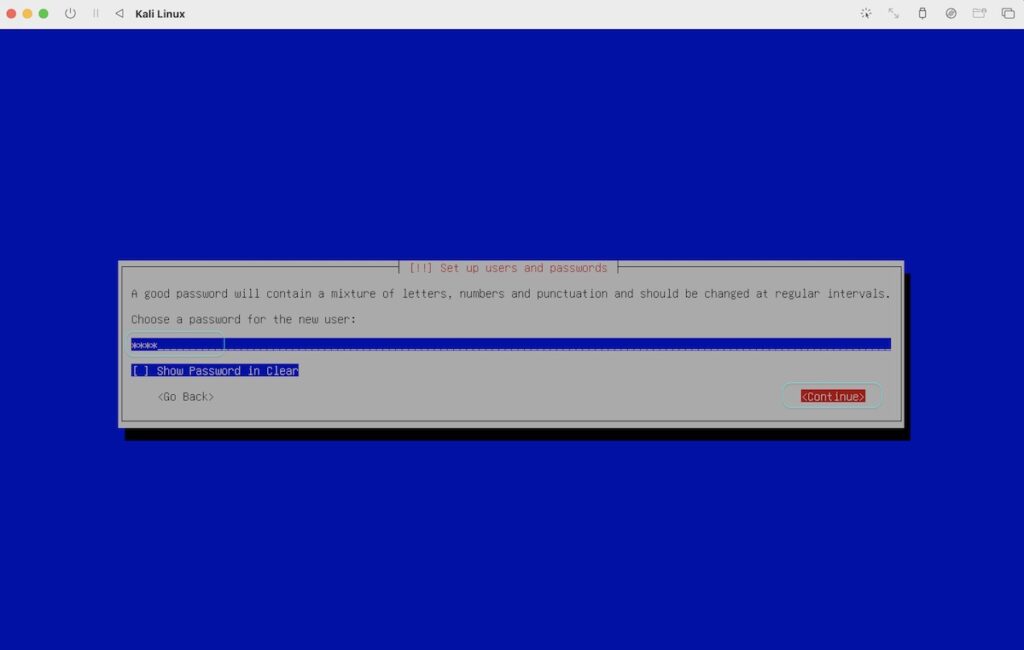
After username set, you require to setup password. Carefully type a password here that you can’t forget. It’s important.
Step 26:
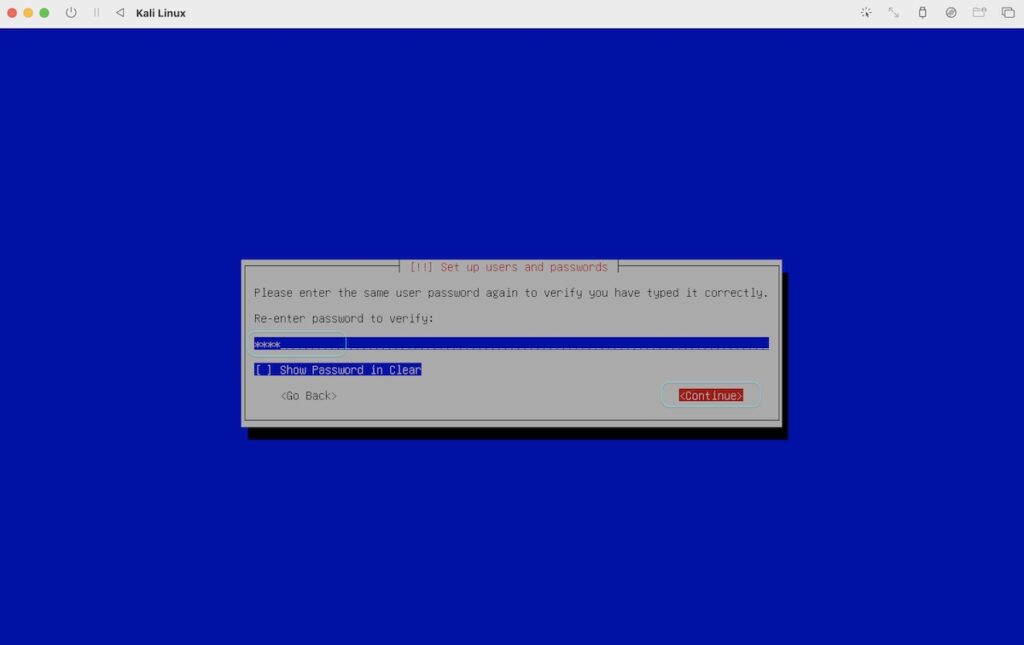
Now that you’ve selected a password, ensure its accuracy by retyping it in the provided window. This step is crucial to prevent any mistakes, and once completed, you’ll be all set for future logins. Hit “Enter” to continue.
Step 27:
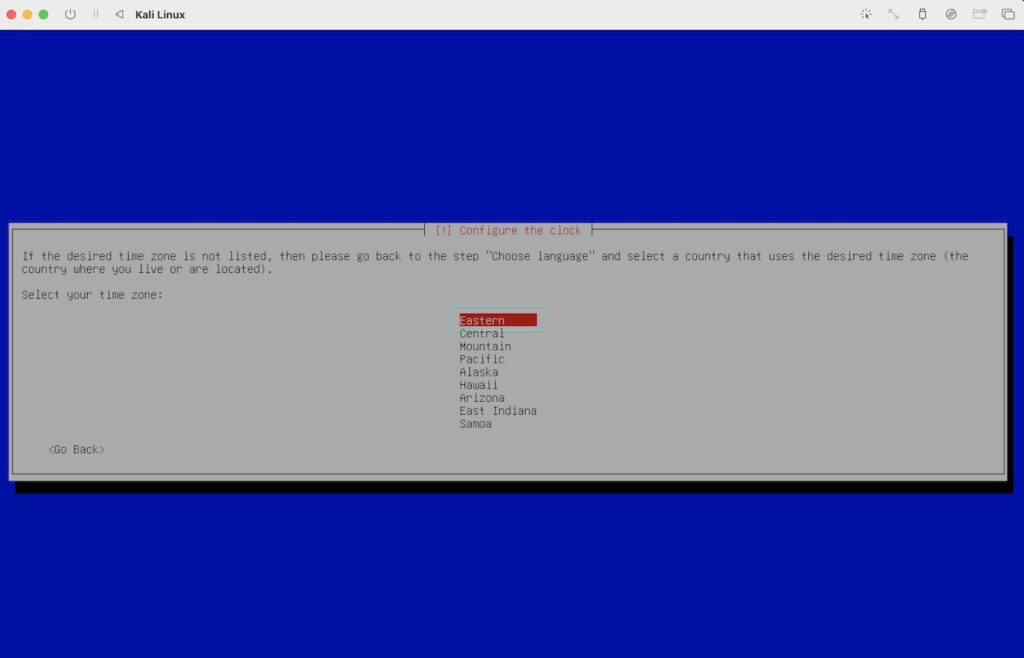
Well done on setting up your password. Next, proceed to select the time zone under “Configure the clock.” You can simply press “Return” since a default time zone will already be preselected based on your host computer’s clock settings.
Step 28:
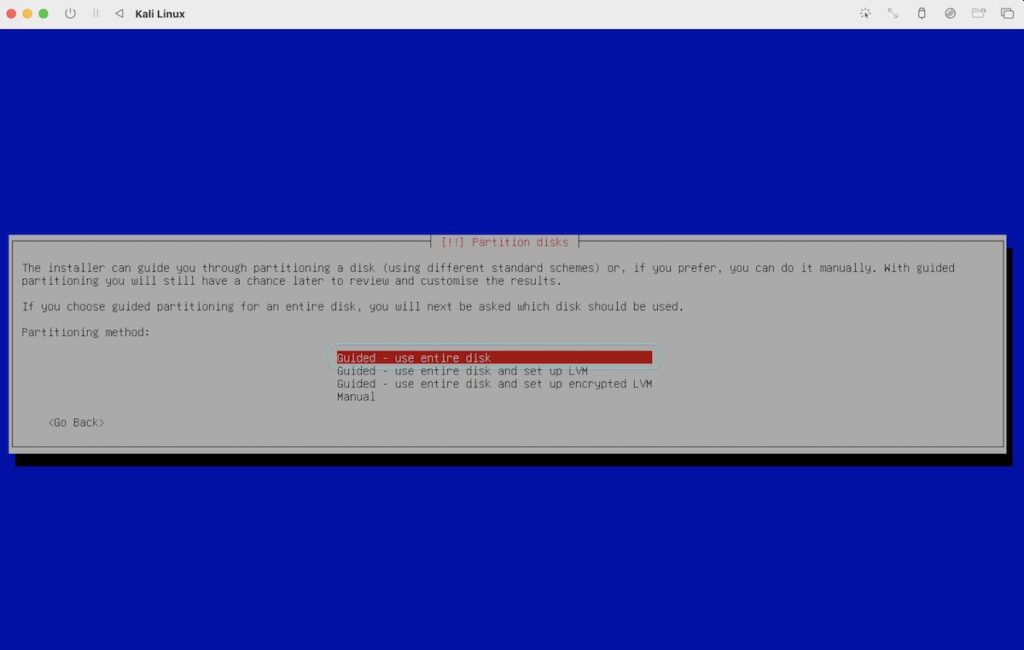
Now, you’ll encounter an important step in setting up the partition disks. Don’t fret; just choose the default option, “Guided – use entire disk.” It’s worth noting that this selection pertains to the 32GB disk allocated for your virtual machine, not your entire Mac disk. So, go ahead and let it utilize the full 32GB disk space by pressing “Return.” It’s that straightforward.
Step 29:
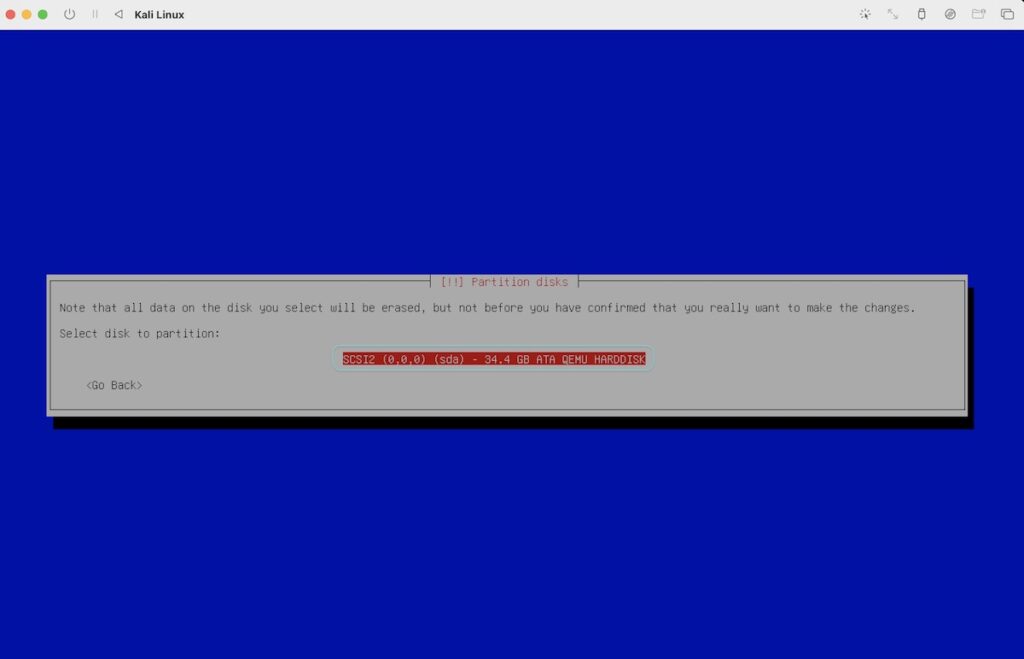
On the subsequent page, you can proceed by simply pressing “Return” since it has already selected “SCSI2 (0,0,0) (sda) – 34.4 GB ATA…” as the drive. Don’t be concerned about minor differences in drive size; this is entirely normal. Just hit “Return” to continue.
Step 30:
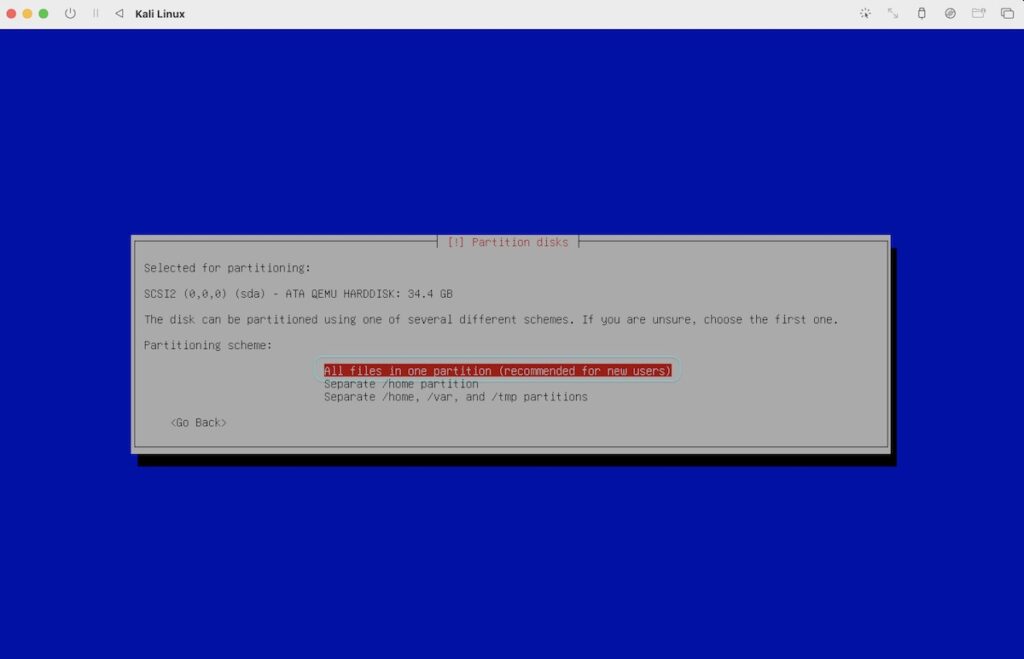
Followed up will have a default selection of “All files in one partition (recommended for new users)“. Simply hit “Return” to continue.
Step 31:
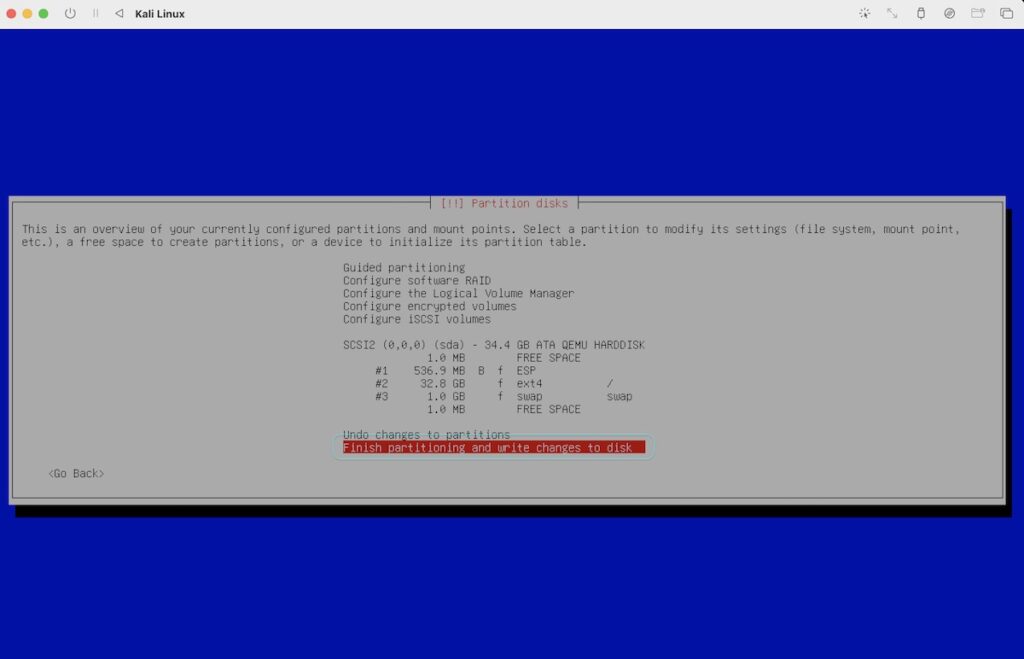
Once the partitioning tool has completed its task, it will display the information, and you’ll find that “Finish partitioning and write changes to disk” is already selected as the default option. To proceed, simply press “Return.”
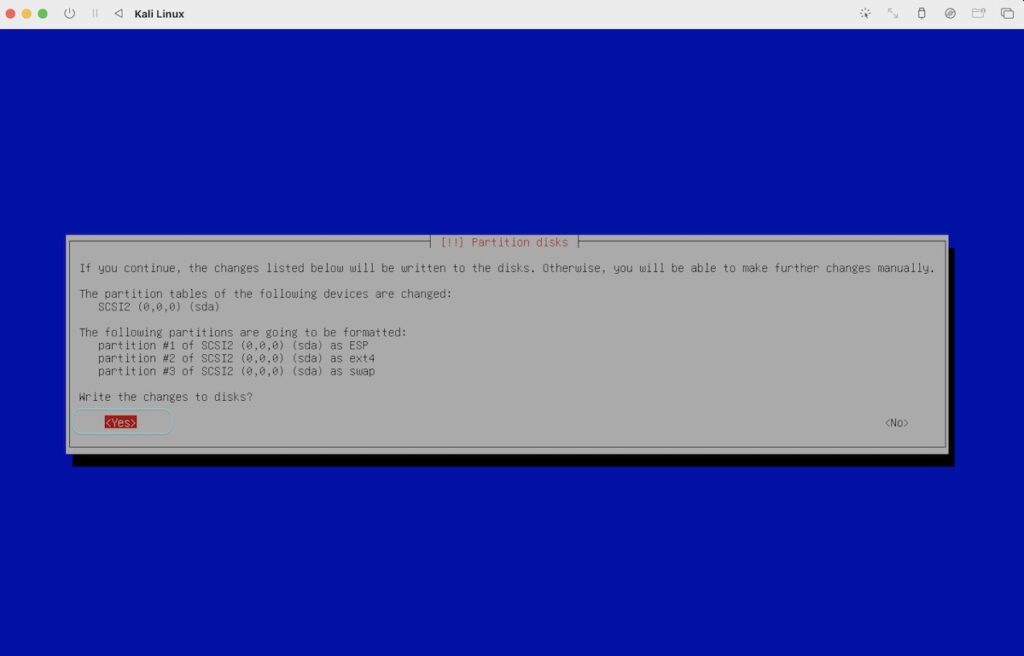
Step 32:
Great work! You’ve reached the page that requires your acceptance to continue. To select “Yes,” just press the “Tab” key until “Yes” is highlighted, and then press “Return.” If, by chance, you accidentally select “No,” don’t worry. Just keep pressing “Return” on the default selection in the previous page that it opened, and you’ll return right back to this point.
Step 33:
On the upcoming page, you’ll find various options under “Software selection.” By default, “Desktop environment,” “Xfce,” “Collection of tools,” “top 10,” and “default recommended tools” will be selected. To proceed, simply press “Return” to continue installation as no custom selections are necessary here.

Step 34:
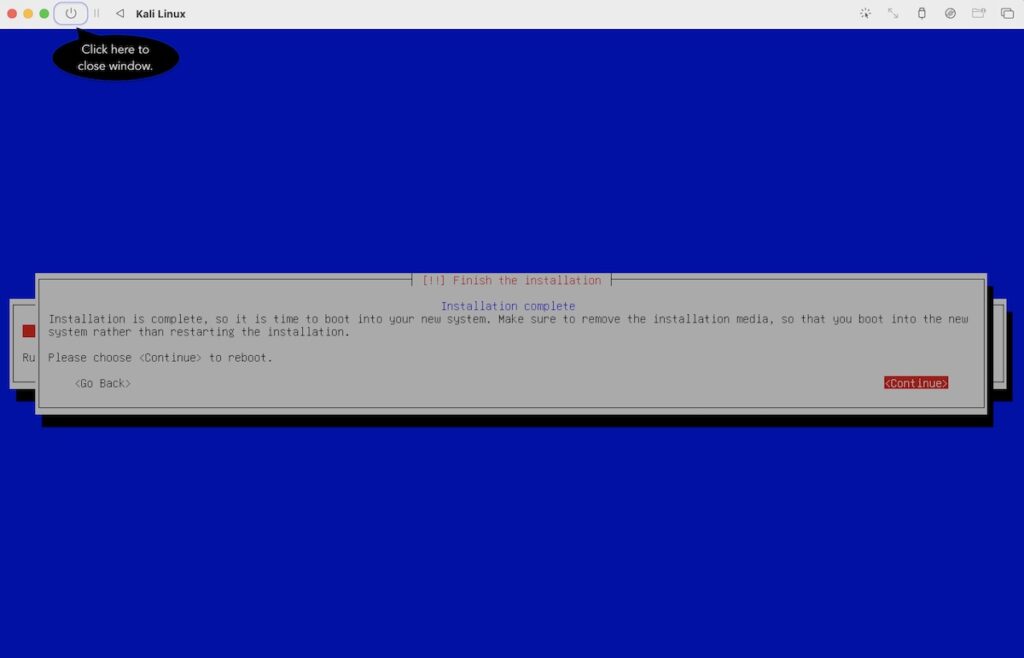
After a brief wait depending on the speed of your Mac, you’ll arrive at the “Finish the installation” page. However, please do not click on “Continue” at this point. Instead, click on the power icon located at the top left corner of the window to exit this screen. Clicking “Continue” at this stage can result in your machine promptly start-over the same process we took so long to complete. If you accidentally clicked “Continue,” don’t worry. Just close the window as soon as the virtual machine starts to run, and you’ll be safe to do so.
Step 35:
Congratulations on successfully completing the installation and configuration of your virtual machine! To further optimize your setup, there are a couple of tweaks to make. Begin by navigating to the right-side window and locating the bottom box labeled “CD/DVD.” Click on it and select “Clear.”
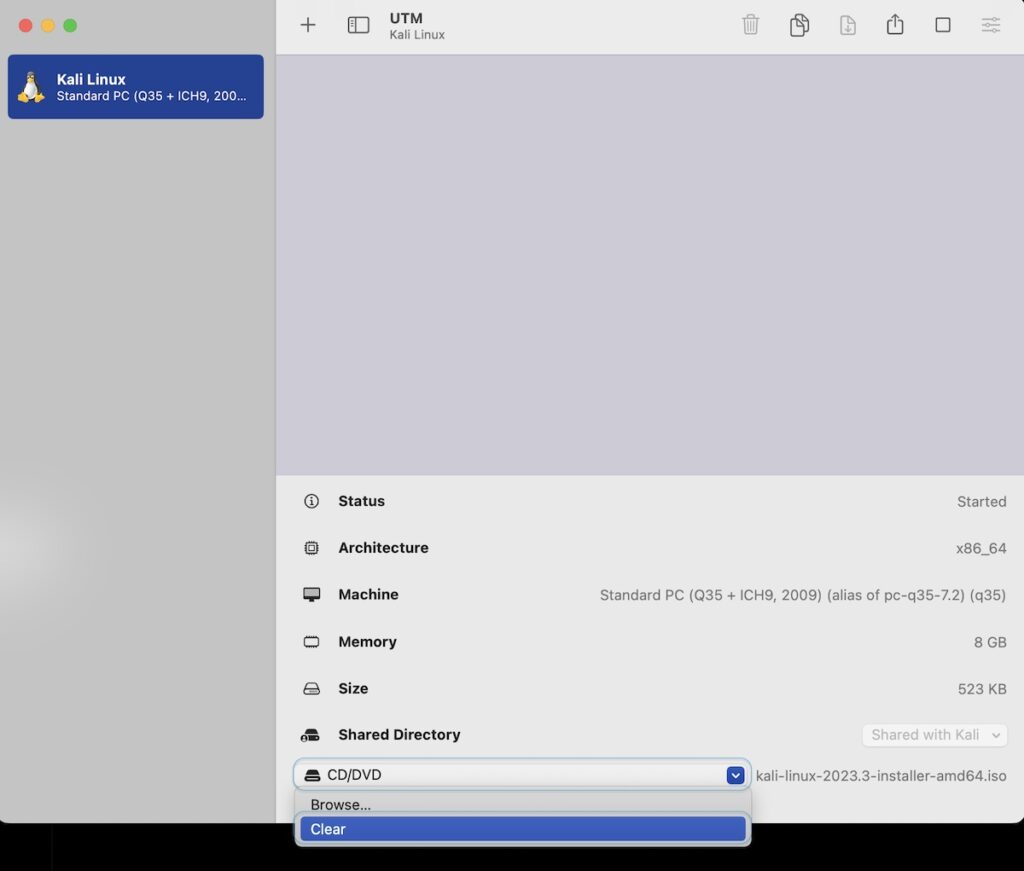
Step 36:
Excellent! Your virtual machine will no longer attempt to boot from the CD/DVD, ensuring it boots from the correct disk. With that sorted, proceed by right-clicking on the VM named “Kali Linux” (or the name you have named) in the left panel, and then select “Edit.”
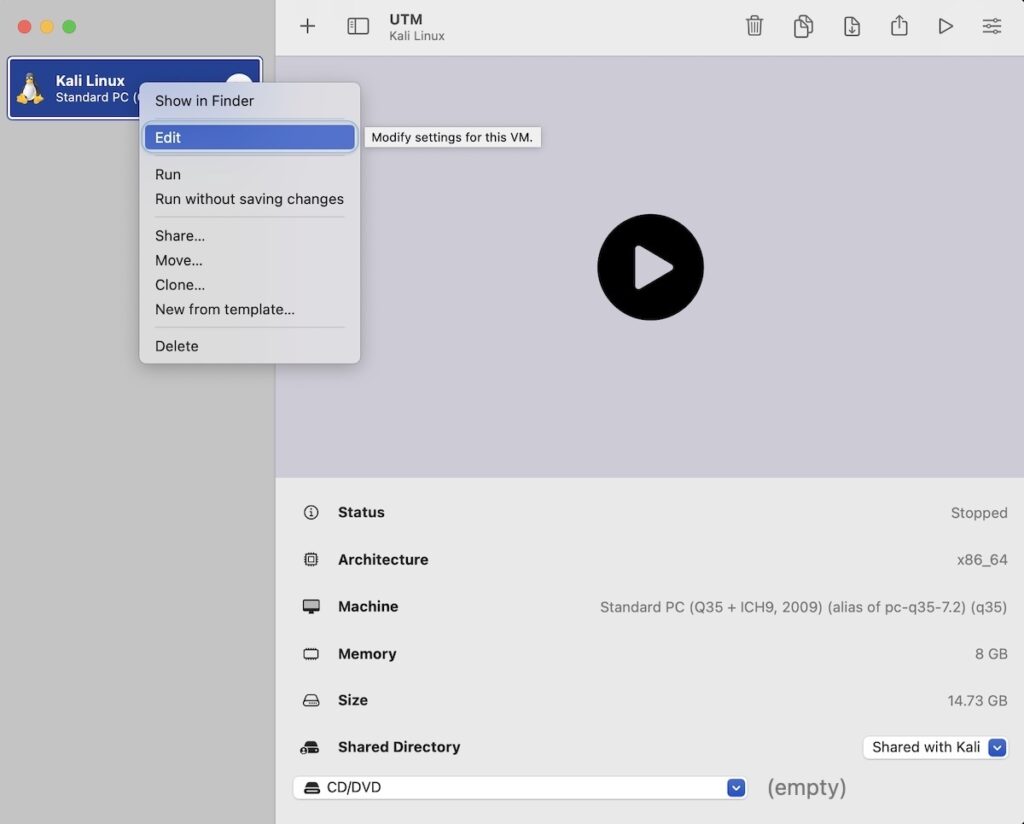
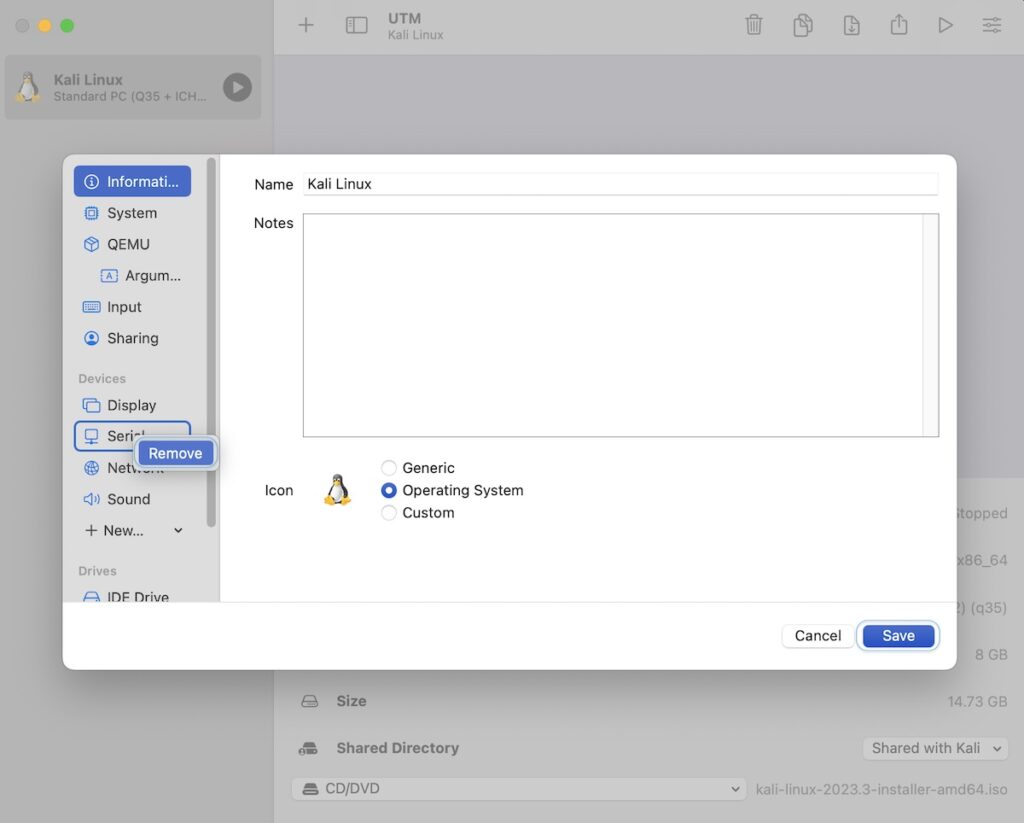
Step 37:
Awesome! You’re almost there. After selecting “Edit,” you’ll encounter a new window with a left panel. Locate “Serial,” right-click on it, and select “Remove.” That’s the final step! Now, click on “Save.” You’re all set and ready to go!
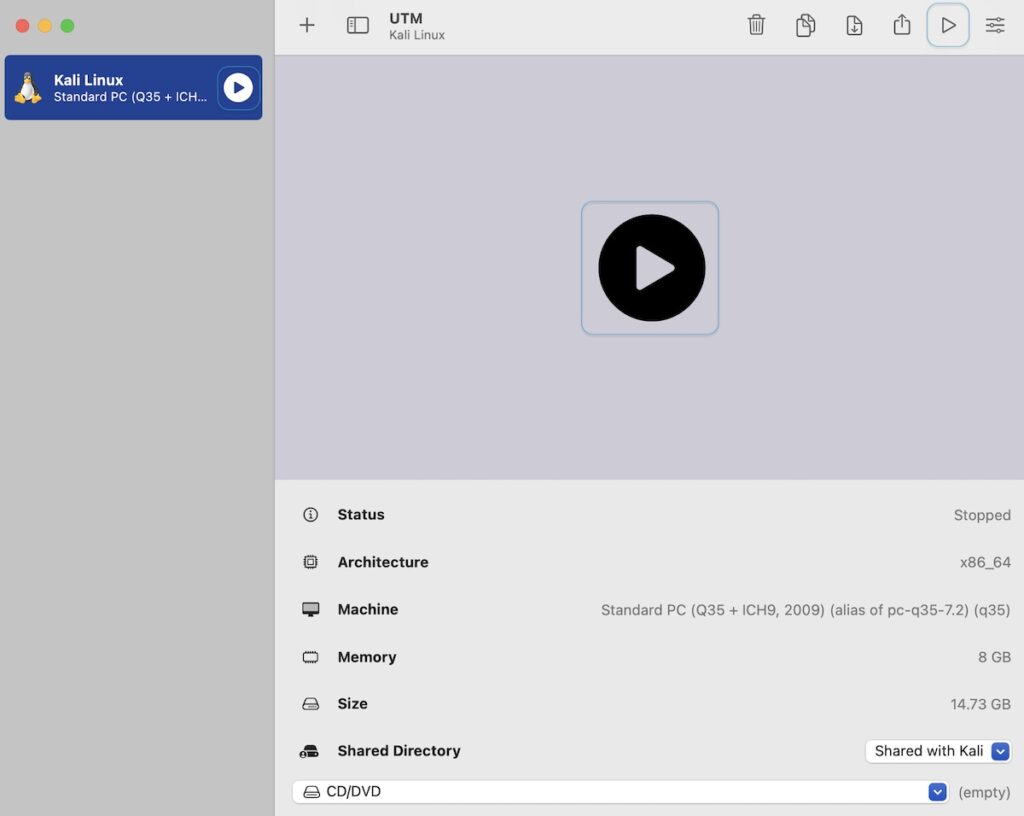
Step 38:
Didn’t that feel like an adventure? I hope you enjoyed it! Now, you’re left with a window that has your Kali Linux. Just go ahead and click on any PLAY button, and you can embark on your exciting journey with Kali. Explore and enjoy the experience!
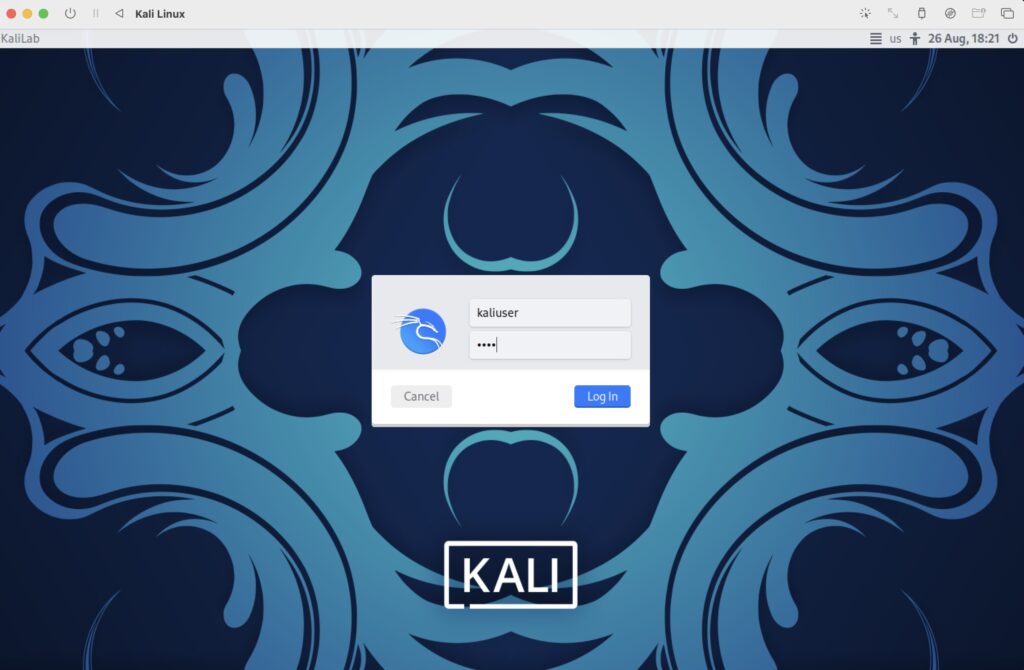
Step 39:
You should now see a login screen, and indeed, you did! Go ahead and log in to your Kali Linux.
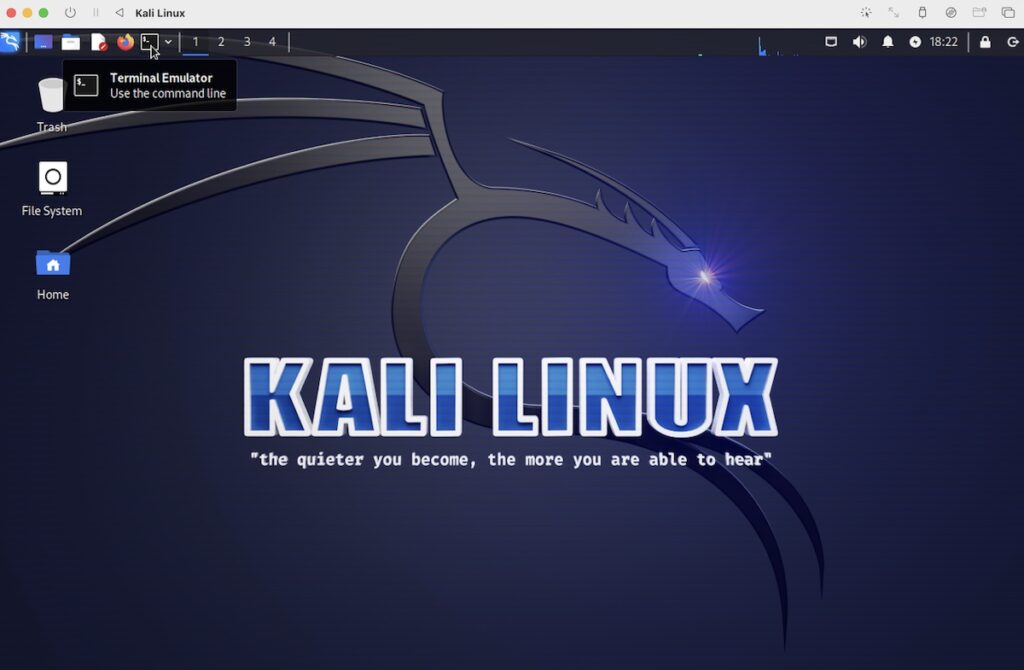
Step 40:
After successfully logging in with your username and password, you will find a terminal window, which looks like the one shown below. Simply open it to continue.
Step 41:
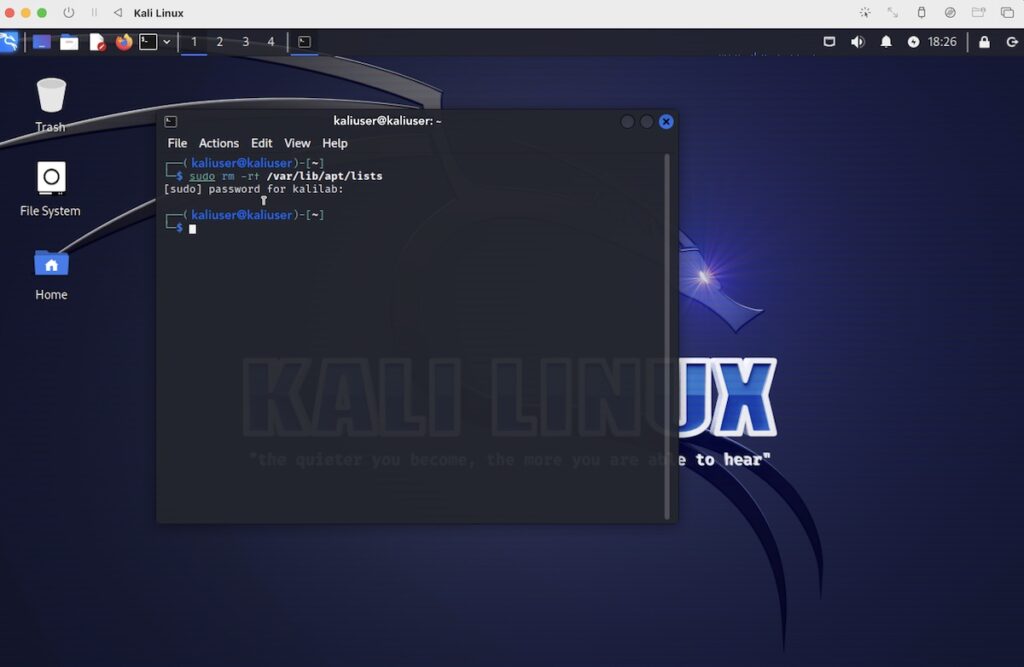
When the terminal emulator opens, type the following command:
sudo rm -rt /var/lib/apt/lists Enter your password when prompted and press “Return.” The command will effectively and recursively remove all the contents of the /var/lib/apt/lists directory, which includes the package lists used by APT, ensuring a smooth update process. You will receive a result similar to the one displayed below:
Step 42:
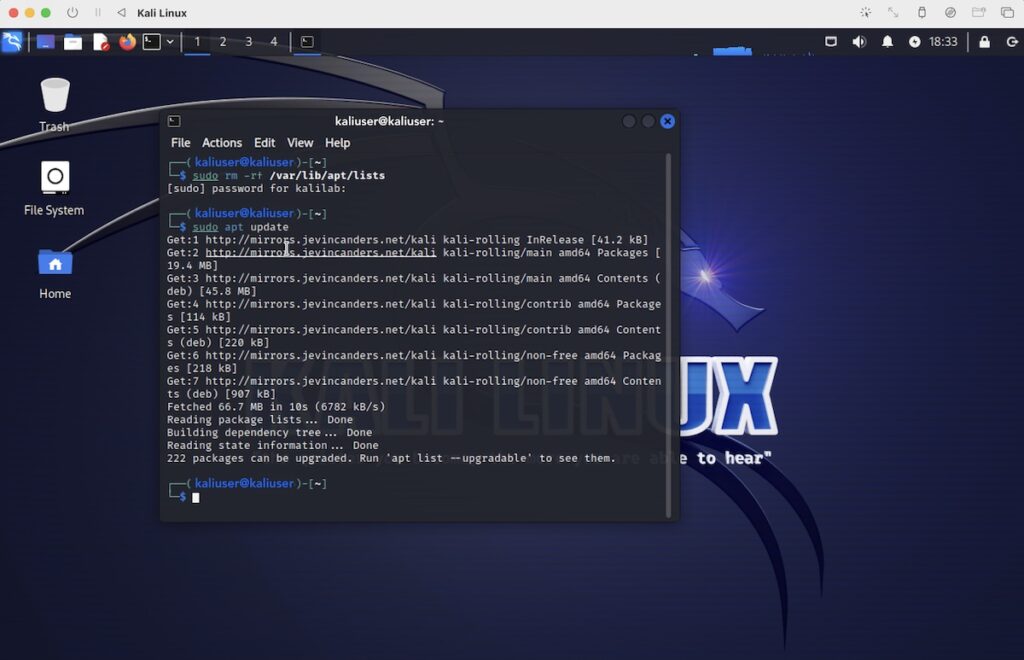
Then type the following command to get it updated:
sudo apt update Then, press “Return.” Your results will resemble what’s shown below, possibly with minor variations depending on the updates being processed. That’s all there is to it. Now, you can close the terminal window and dive into exploring Kali Linux according to your preferences.
One piece of advice: master it but never try to slave or slay others.